
ToDo List Part 1 Tutorial
Let's build a Todo-List!
Learning Objectives:
On-Submit Events
On-Click Events
DOM Element Creation
DOM Element Insertion
DOM Element Removal
Step 0: Set Up
Starter Code [download]
Create a folder called day_6 and create three files inside of it:
day_6
index.html
styles.css
index.js
Now, paste this code into them:
Ask your ToDo List Questions on Parthean Community.
Step 1: Adding the Form
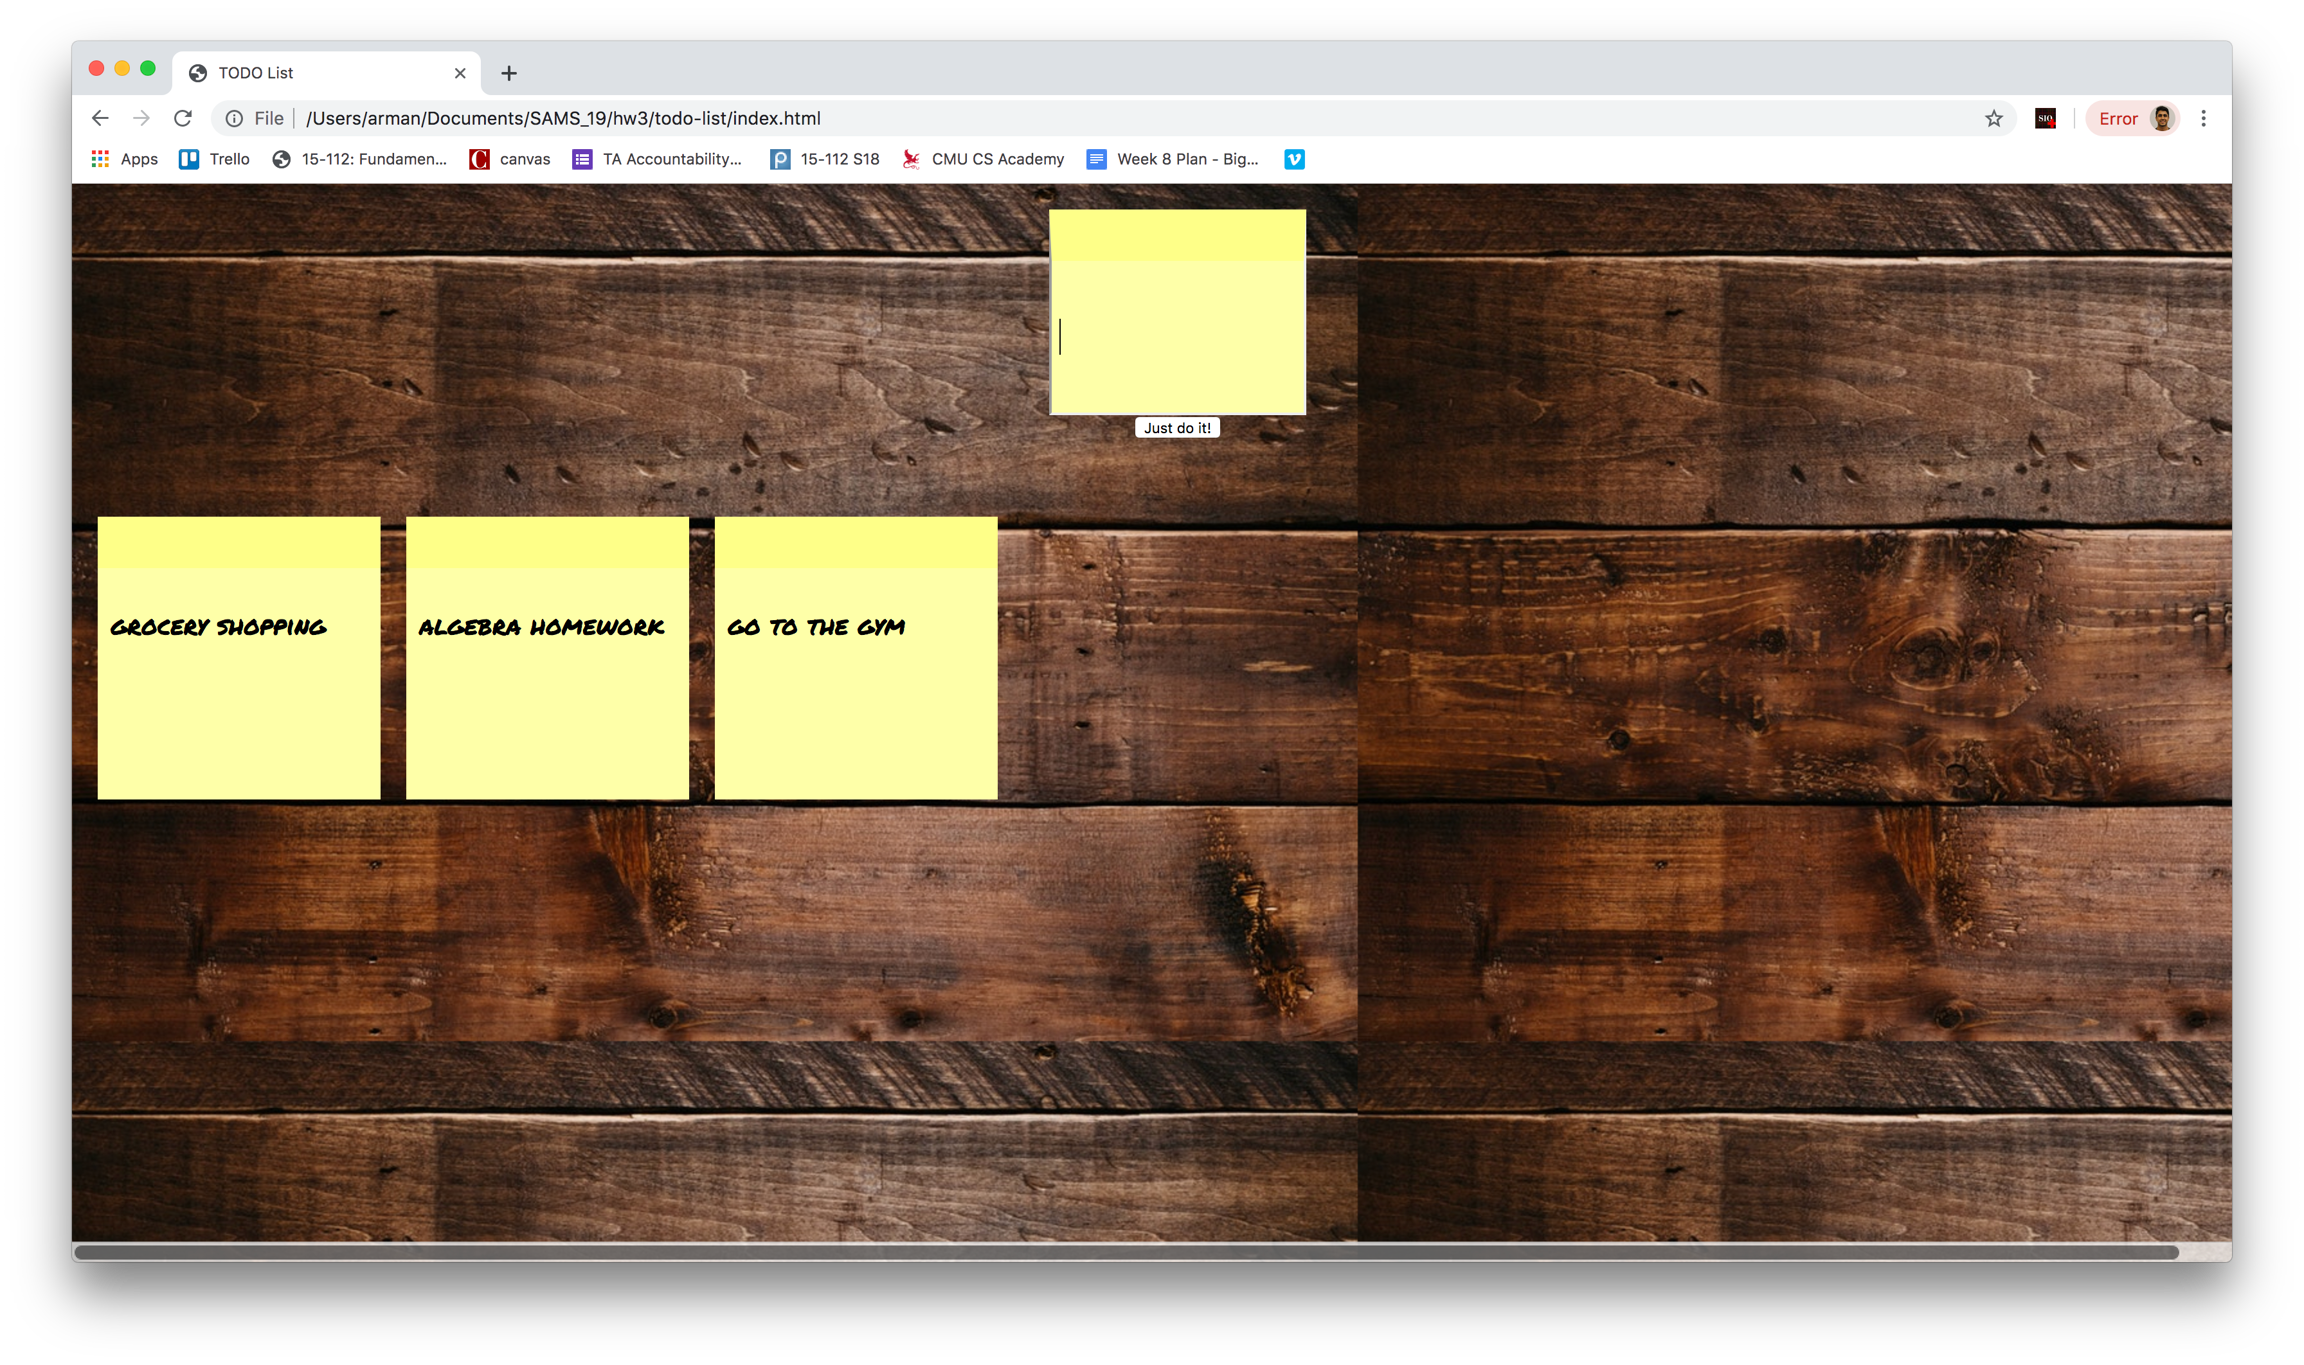
If you look at the image at the top of this page, you'll see a sticky note at the center of the page with a button below it. That's actually a form with two inputs (one with type="text" and the other with type="submit"), as shown below:
Here, we have a form with id="form1" and a text input with id="todo-input". These IDs will give us the ability to work with these DOM elements in javascript. We'll see exactly what I mean in step 2.
We also have a submission input with value="Just Do It!". The value attribute allows us to specify what text we want on our submission button.
Add this form to the body of your html file!
Not too pretty, right? To make it prettier, try adding this to the css code:
In that css code, we're using a font-family named "Permanent Marker." This isn't a built-in font, so we need to import it from Google's Font library. To do so, include this line in the header of your HTML file, above the css-link:
To see other Google Fonts, visit their website at: fonts.google.com
Now, we have a pretty site, but when we try to use it, nothing happens. Let's fix that!!!
Ask your ToDo List Questions on Parthean Community.
Step 2: Adding the On-Submit Event Handler
To add the on-submit handler, we'll be using a tool called JQuery. JQuery is an extremely popular and powerful tool that makes certain things in Javascript extremely easy. You won't need to know much about how javascript works, but in order to use it, we'll need to import it. To do so, add the following script tag to the bottom of your body tag, but above the link to index.js:
Now, let's add the following code to index.js:
This code is basically saying "When the form with id 'form1' is submitted, run this function." So, when you submit the form, whatever code you have inside of those curly-brackets should run. To prove this to ourselves, let's add a console.log in there, like so:
Now, every time you submit the form, form submitted! should be logged to the console. If you try it, though, you'll notice that those words appear only briefly, then they disappear! That's because by default, when a form is submitted, the entire page refreshes. But don't worry -- we can fix this by adding the following line of code:
Now it works -- we have code that runs every single time our form is submitted. Woohoo! Our website is still kind of boring, though. Let's actually do something with the text that's being input. For now, add the following code to simply log whatever the user inputs:
We added two lines of code. In the first one, we have a statement saying, document.getElementById("todo-input"), which basically asks the HTML document, "Hey -- Could you give me the element that has the id "todo-input." Then, it stores that element in a variable called todo_input.
To get the value that the user typed, we store todo_input.value in a variable called todo_text, and to prove that it all worked, we log that text to the console! Run that code now, and you'll see that every time you submit the form, whatever you type is logged.
You'll also probably notice something annoying: every time you want to resubmit the form, you have to delete whatever is in the input. Wouldn't it be nice if we could just do that in code??? You can! To empty, or reset, the text input, add the following line of code to the script:
Now, we have a form that runs javascript code upon submission -- great! I'll be the first to admit, however, that this javascript code, although works, doesn't do much -- let's change that now!
Ask your ToDo List Questions on Parthean Community.
Step 3: Inserting Elements to the DOM
Right now, the javascript code simply logs whatever text the user types. However, we want to add that text to the page on a sticky-note. To start, let's replace that console.log with a call to a function:
Now the code will store the text that the user types inside of todo_text and then pass that value to a function to add a new item -- great.
Adding elements to the DOM is a two-step process:
Construct the DOM Element in Javascript
Append the DOM Element to the HTML Document, using Javascript
We'll start with step one.
Constructing DOM Elements
Whenever I construct a DOM element in Javascript, I find it easier if I design it in HTML first, so I also did that for this to-do list application. Each sticky-note, if built in HTML would look like this:
That DOM element is composed of a <div> element with class="todo_card" and a child <p> node. The text will be inside of the <p> node.
Great -- now we know what our element would look like IF we were writing HTML, but we want to use Javascript so we can dynamically create new elements. So, let's write that Javascript now.
Let's start with the construction of the <div> element:
On the first line, we ask the document to create a new div element and we store it in a variable named todo_card. Then, we add a class, called todo_card to that element.
Next, let's create the <p> element:
This code, similar to the last code-block, creates a new p element and stores it in a variable named todo_text_elem.
On the next line, it sets the innerHTML, or the text inside of the <p> element, to be the user's input.
Now, we have the <div> and <p> elements. Next, let's put them together to create one element that we can append to the document! Let's do it:
Here, we're appending the <p> element that we just created, stored in todo_text_elem, to the <div> element, stored in todo_card, creating one element that we can add to the HTML document.
Inserting Elements to the DOM
Before we write more javascript code, we have to have a place in HTML where we can add these elements to. Add the following code to index.html to give us a place to append all of our our sticky-notes:
Lastly, add the following line of code to index.js to append your element to the DOM:
When you run the code, you can see that it works! Woo! Add the following code to styles.css to make it all look better:
The best part of having a To-do list is finishing items and removing them, right? We'll show you how to do that next, and learn about Adding On-Click events along the way.
Ask your ToDo List Questions on Parthean Community.
Step 4: Adding the On-Click Event to Remove Elements from the DOM
It would be really annoying if you couldn't remove items from your todo list, right? Let's add a feature to make it such that when a user clicks on a sticky-note, it is removed. To do so, let's head over to javascript and add whats called an event listener.
This piece of code adds an event listener to the todo_card element. In english, that piece of code is saying "Hey Javascript, every time the todo_card element is clicked, call this function."
So, if we said we wanted to remove a sticky-note every time the element is clicked, we have to replace // Your code here! with code to remove the todo_card element. This is trickier than you may think, though.
The code in that function isn't running now -- it runs when something is clicked, but we don't know when that will be. As such, we need a way to identify the sticky-note whenever that happens.
As such, we'll have to give the todo_card element an id, like so:
We start by creating a new variable that stores a random number. We're using a random number because we want our IDs to be unique and we can assume that these random numbers won't repeat.
You should NOT always use this method because random numbers DO repeat. We're just using this for this example, but it is generally not great practice.
The next line sets the id of the todo_card element to the value we just produced.
Now that we have a unique ID in each of our sticky-notes, we can simply replace // Your code here! in our javascript file with the following line of code:
This line asks the document "Can I have the element that has an ID equal to todo_card_id?" which is the value we just calculated!
Ask your ToDo List Questions on Parthean Community.
That's it!
You did it! You made a todo-list application using DOM manipulation. You'll notice that if you refresh, nothing is saved. That's because there's no back-end (hint: we'll learn that next).
Want to show off your work? Post your results on Parthean Community.
Last updated